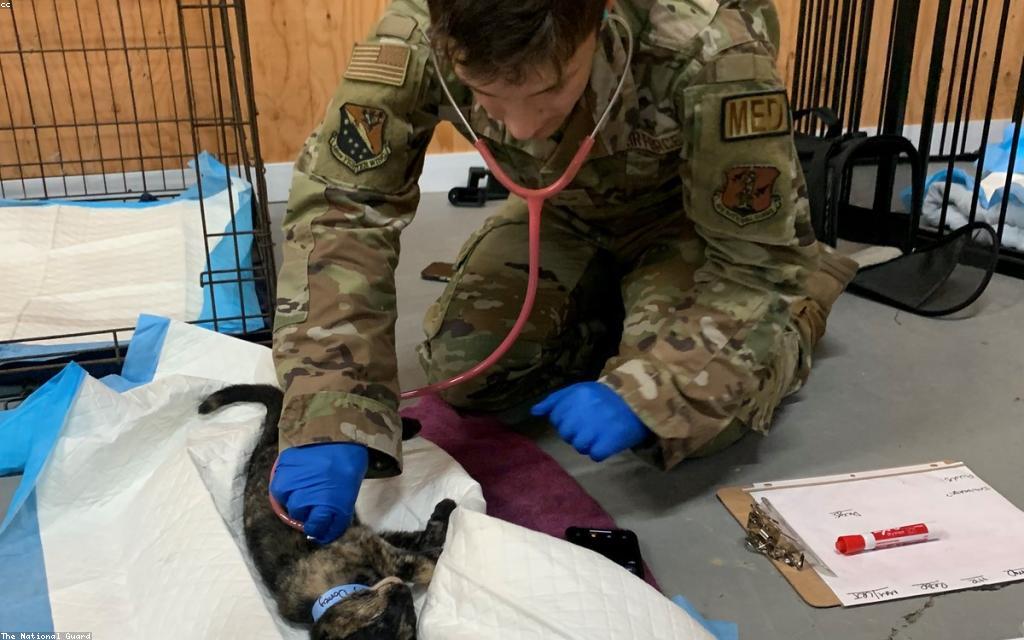
Caring for Your Pet at Home After Surgery

The riskiest part of many pet surgeries is not the operation. It is the first week at home, when a licked incision, a missed medication, or too much activity can turn a routine recovery into a complication. This guide walks you through what to expect after anesthesia, how to protect the incision, and the exact signs that mean you should call your veterinarian.

The First 24 Hours: Anesthesia Recovery

Anesthetic and sedative drugs leave the body gradually, so grogginess, wobbliness, and a low appetite on the first evening are expected. Your job is to provide a warm, quiet, safe space and keep your pet away from stairs, furniture jumps, and other animals.

Food and Water After Anesthesia

Offer only a small amount of water at first. If your vet approves food that evening, give a small, light meal rather than a full portion. A groggy pet can gag or vomit if it eats too much too soon. Full appetite usually returns within a day; if it does not, that is worth a call.

Protecting the Incision

Most post-surgery problems trace back to the incision. The single most effective tool is the recovery cone (the E-collar), and it only works if it stays on. Licking introduces bacteria and can pull out stitches, which is a leading cause of infections and reopened wounds.

  • Keep the cone on at all times, including overnight, unless your vet says otherwise. A soft or inflatable collar only works if your pet cannot reach the incision around it.
  • Check the incision twice a day. A thin line, mild redness, and slight swelling are normal early on.
  • Keep the area dry. No baths, swimming, or ointments unless prescribed. Damp wounds heal poorly.

What a Healthy Incision Looks Like

Edges should be together and the skin a healthy pink to slightly red. A little bruising can appear a day or two later. Watch for change over time; a wound that looks worse each day rather than better is the concern.

Activity Restriction: The Hardest Part

Owners often underestimate this. Internal healing takes longer than the skin surface, so a pet that feels fine at day four can still tear internal sutures by running or jumping. For most soft-tissue and orthopedic surgeries, strict rest is advised for 10 to 14 days, but always follow your surgeon’s specific timeline.

  • Leash walks only for bathroom breaks; no free running, stairs, or rough play.
  • Confine to a crate or a small room when unsupervised.
  • Separate from other pets who may want to play.

A Real Example

A young Labrador came through a neuter smoothly, but the owner removed the cone at day three because the dog seemed uncomfortable. Within hours the dog licked the incision open and needed a second sedation to re-close it, extending recovery by another two weeks. Nothing went wrong in surgery. The setback came entirely from a cone removed too early. The lesson: the cone stays on until your vet clears it.

Common Mistakes and How to Fix Them

  • Taking the cone off for pity. Fix: keep it on; discomfort fades and the wound stays protected. Ask about a softer alternative if needed.
  • Stopping pain medication early because the pet seems fine. Fix: finish the prescribed course; pets hide pain, and steady relief keeps them calmer and less likely to overdo it.
  • Giving human painkillers. Many, including ibuprofen and acetaminophen, are toxic to dogs and cats. Fix: use only what your vet prescribed.
  • Letting activity ramp up too soon. Fix: enforce rest for the full window even when your pet looks recovered.
  • Cleaning the wound with hydrogen peroxide or alcohol. Fix: leave it alone unless your vet gives specific instructions; harsh cleaners damage healing tissue.

When to Call Your Vet

Contact your veterinarian promptly if you see any of these.

  • The incision opens, bleeds steadily, or has yellow, green, or foul-smelling discharge.
  • Swelling that grows, or the wound looks worse each day.
  • Repeated vomiting, or not eating for more than 24 hours.
  • Extreme lethargy, pale gums, or difficulty breathing.
  • Signs of pain that medication is not controlling, such as constant whining or restlessness.

Recovery Checklist

  • Set up a warm, quiet, confined recovery space before you bring your pet home.
  • Offer small amounts of water and food as directed on the first night.
  • Keep the E-collar on until your vet says to remove it.
  • Check the incision twice daily; keep it clean and dry.
  • Give all medications on schedule and finish the course.
  • Enforce strict rest for the full period your surgeon advised.
  • Keep the emergency and vet phone numbers within reach.

Conclusion

Successful recovery comes down to three habits: protect the incision, restrict activity, and follow the medication plan exactly. Your next step: before surgery day, prepare a quiet recovery area and write down your vet’s discharge instructions so you are not improvising when your pet comes home groggy.

Frequently Asked Questions

How long does my pet need to wear the cone?

Usually until the stitches are removed or the incision has fully healed, often around 10 to 14 days. Follow your vet’s exact instruction. Removing it early is a common reason wounds reopen.

Is it normal for my pet not to eat after surgery?

A reduced appetite on the first evening is common as anesthesia wears off. Most pets eat normally by the next day. If your pet refuses food for more than 24 hours, call your vet.

Can I give my dog or cat human pain medicine?

No. Common human painkillers like ibuprofen and acetaminophen can be toxic and even fatal to pets. Use only the pain medication your veterinarian prescribed.

How much can my pet move during recovery?

For most surgeries, only short leashed bathroom breaks, with no running, jumping, or stairs for 10 to 14 days. Internal healing lags behind the skin, so rest matters even when your pet seems energetic.

The incision looks a little red and swollen. Should I worry?

Mild redness and slight swelling in the first days can be normal. Concerning signs are worsening over time, growing swelling, discharge, a bad smell, or the wound opening. When in doubt, send your vet a photo or call.

References

  • American Veterinary Medical Association (AVMA)
  • American Animal Hospital Association (AAHA)
  • American College of Veterinary Surgeons (ACVS)

Home Dental Care for Dogs and Cats That Works

Dental disease is one of the most common health problems in dogs and cats, and most of it is preventable at home. The single most effective thing you can do is brush your pet’s teeth, ideally daily. This article shows you how to build a brushing habit your pet will tolerate, which products genuinely help, and how to spot trouble before it becomes a painful, costly extraction.

Why home dental care matters

Plaque forms on teeth within hours of eating. Left alone, it hardens into tartar in a few days, and tartar cannot be brushed off. Bacteria under the gumline then drive periodontal disease, which is painful, destroys the bone that holds teeth in place, and can affect overall health. Home care targets plaque during that early window, before it becomes cemented tartar that only a professional cleaning can remove.

Important honesty point: home care slows disease, it does not replace professional cleanings under anesthesia. Think of brushing like your own daily brushing, and the vet cleaning like your dental scaling appointment. You need both.

Brushing: the gold standard

Brushing physically disrupts plaque, which is why it outperforms every passive product. Use a pet-specific toothpaste, never human toothpaste, because ingredients like xylitol and high fluoride are toxic to pets.

How to introduce a toothbrush

Rushing this is the number one reason people quit. Build it up over one to two weeks:

  • Days 1-3: let your pet lick pet toothpaste off your finger so the taste becomes a reward.
  • Days 4-6: rub the paste along the outer gumline with your finger for a few seconds.
  • Days 7-10: introduce a soft pet toothbrush or finger brush on a few teeth.
  • Day 10 onward: work up to the full mouth, focusing on the outer surfaces where plaque builds most.

Keep sessions short and end on a positive note. You only need to brush the outer surfaces; the tongue handles much of the inner side.

How often

Daily is ideal because plaque returns every day. Three times a week is a reasonable minimum. Less frequent than that gives limited benefit.

What to use when brushing is not possible

Some pets, and some cats in particular, simply will not accept a brush. Passive options help but are weaker:

Method Effectiveness Notes
Daily brushing Highest Physically removes plaque
Dental diets Moderate Kibble texture scrubs teeth
Dental chews Moderate Watch calories and choking
Water additives Low to moderate Convenient, mild effect

When choosing chews, diets, or additives, look for the Veterinary Oral Health Council (VOHC) Seal of Acceptance. VOHC is a real, independent body that reviews evidence that a product reduces plaque or tartar, so its seal is a useful filter among countless marketing claims.

A useful related read is this detailed article.

A real scenario

An owner of an 8-year-old cat noticed bad breath but no other signs. On exam, several teeth had heavy tartar and red gums, and one tooth had a painful resorptive lesion the cat had hidden completely. The cat had been eating normally the whole time because cats mask oral pain. After a professional cleaning and one extraction, the owner started a finger-brush routine three times a week. Two years later, no further extractions. Bad breath was the only early clue, and it was easy to miss.

Common mistakes and how to fix them

  • Using human toothpaste. Fix: use pet toothpaste only; human products can be toxic.
  • Starting with the full mouth on day one. Fix: build tolerance gradually so brushing stays stress-free.
  • Relying only on chews or water additives. Fix: treat these as supplements to brushing, not replacements.
  • Assuming bad breath is normal. Fix: persistent bad breath usually signals disease and deserves a vet check.
  • Giving hard chews that fracture teeth. Fix: avoid antlers, bones, and very hard nylon; if you cannot dent it with a fingernail, it may be too hard.
  • Skipping professional cleanings. Fix: home care cannot remove existing tartar or treat below the gumline.

Your action checklist

  • Buy pet toothpaste and a soft pet or finger toothbrush.
  • Spend one to two weeks building tolerance before full brushing.
  • Brush the outer tooth surfaces daily, or at least three times weekly.
  • Choose chews and diets carrying the VOHC seal.
  • Avoid very hard chews that can crack teeth.
  • Check monthly for bad breath, red gums, or reluctance to chew.
  • Schedule professional dental exams as your vet advises.

Conclusion and next step

Consistent home brushing plus periodic professional cleanings is the most reliable way to keep your pet’s mouth healthy and pain-free. Your next step: pick up a pet toothbrush and toothpaste this week, and tonight let your pet simply taste the paste. That one small step starts the habit.

FAQ

Is it too late to start brushing an adult pet?

No. Brushing helps at any age. If there is already tartar, ask your vet whether a cleaning should come first so you start with a clean slate.

How do I know if my pet has dental disease?

Warning signs include bad breath, red or bleeding gums, visible tartar, drooling, dropping food, chewing on one side, or a paw at the mouth. Cats especially hide oral pain, so an exam is the reliable check.

Are dental chews enough on their own?

They help but are less effective than brushing. Use them as a backup, particularly for pets that refuse a brush, and choose VOHC-accepted products.

Why does a professional cleaning need anesthesia?

Cleaning below the gumline, taking dental X-rays, and treating painful areas cannot be done safely or thoroughly on an awake pet. Anesthesia-free cleanings only polish visible surfaces and miss the disease under the gums.

References

  • Veterinary Oral Health Council (VOHC)
  • American Veterinary Dental College (AVDC)
  • American Animal Hospital Association (AAHA) Dental Care Guidelines

How to Switch Your Pet’s Food Without an Upset Stomach

Changing your pet’s food too fast is one of the most common causes of sudden vomiting, diarrhea, and refusal to eat. The good news: most of it is preventable. This guide gives you a practical, day-by-day method to switch foods without wrecking your dog’s or cat’s stomach, plus how to spot the difference between a normal adjustment and a real problem.

Why a Sudden Switch Upsets the Gut

The digestive tract relies on a stable population of gut bacteria and a steady set of enzymes matched to the current diet. When you replace one food with a completely different one overnight, the gut microbes and enzymes have not adapted to the new protein source, fat level, or fiber. The result is often loose stool, gas, or vomiting within 24 to 48 hours.

This is why the fix is almost always the same: go slower. A gradual transition gives the microbiome time to shift and reduces the shock to the system.

Two Situations, Two Speeds

Not every switch should move at the same pace.

  • Planned switch (healthy pet): Use a 7 to 10 day transition. This suits changing brands, moving from puppy to adult formula, or upgrading quality.
  • Medically driven switch (sensitive or older pet): Stretch it to 2 to 3 weeks. Pets with a history of digestive upset, food sensitivities, or chronic conditions need extra time.

A Reliable Transition Schedule

Mix the old and new food in the same bowl, adjusting the ratio over time. A standard 7-day plan looks like this.

Days Old food New food
1-2 75% 25%
3-4 50% 50%
5-6 25% 75%
7+ 0% 100%

If stool gets loose at any stage, do not push forward. Hold at the last ratio your pet tolerated for two or three extra days, then continue. It is normal for a transition to take longer than the plan on paper.

A Real Example

A client switched her 8-year-old cat from a fish-based food to a chicken formula in a single day because the old bag ran out. Within a day the cat had diarrhea and skipped two meals. We restarted with the old food she still had, then blended in the new one over 12 days, adding a splash of warm water to soften kibble and boost interest. By the end, the cat ate the new food fully with normal stool. The problem was never the new food itself. It was the speed.

Common Mistakes and How to Fix Them

  • Going cold turkey. The number one error. Fix: always keep enough old food on hand to run a full transition before the old bag is empty.
  • Changing more than one thing at once. New food plus a new treat plus a supplement makes it impossible to know the cause of any upset. Fix: change one variable at a time.
  • Mistaking picky behavior for illness. Some pets sniff and walk away from anything new. Fix: warm the food slightly, feed on a schedule rather than free-feeding, and remove uneaten wet food after 20 to 30 minutes.
  • Ignoring warning signs. A little soft stool is expected. Repeated vomiting, blood in stool, lethargy, or no eating for more than 24 hours (dogs) or 12 hours (cats, especially overweight cats) is not. Fix: stop and contact your veterinarian.

Action Checklist

  • Confirm the new food is complete and balanced for your pet’s life stage.
  • Buy the new food before the old one runs out.
  • Pick your pace: 7-10 days for healthy pets, 2-3 weeks for sensitive ones.
  • Mix both foods in one bowl and follow the ratio schedule.
  • Track stool quality daily; hold the ratio if it loosens.
  • Keep fresh water available and avoid new treats during the switch.
  • Call your vet if serious signs appear.

Conclusion

A smooth food switch is mostly about patience, not a special product. Plan ahead, transition gradually, watch the stool, and slow down at the first sign of upset. Your next step: check what you are feeding now, buy the new food while you still have a week of the old left, and start the schedule above.

Frequently Asked Questions

How long should switching pet food take?

For a healthy dog or cat, 7 to 10 days is typical. For pets with sensitive stomachs, food sensitivities, or chronic illness, 2 to 3 weeks is safer. Let your pet’s stool guide the pace.

Is some diarrhea normal when changing food?

Mild, brief softening of the stool can happen and usually settles as you go slower. Watery diarrhea that persists, or any blood, vomiting, or loss of appetite, is not normal and warrants a call to your vet.

Can I switch my pet’s food faster if it is the same brand?

Moving between recipes with similar main ingredients is often easier, but the gut still needs to adjust. A shortened 5 to 7 day transition is reasonable, but skipping the transition entirely still risks upset.

My pet refuses the new food. What can I do?

Warm it slightly to release aroma, mix a larger share of the familiar food, feed at set times instead of leaving food out all day, and avoid offering treats that fill them up. If refusal continues for more than a day or two, ask your vet.

Should I add a probiotic during the switch?

A veterinary-recommended probiotic can help some pets, but it is not a substitute for a slow transition and is not needed for every animal. Ask your vet before adding supplements, and change only one thing at a time.

References

  • American Animal Hospital Association (AAHA)
  • American Veterinary Medical Association (AVMA)
  • WSAVA Global Nutrition Committee

Core vs Optional Pet Vaccines: What Your Pet Needs

Vaccine schedules can feel like a menu you are not qualified to order from. This guide explains the difference between core and optional vaccines, how often boosters are genuinely needed, and how to build a plan that protects your pet based on real risk, not fear or upselling.

Core versus optional: the key idea

Vaccines fall into two groups. Core vaccines protect against diseases that are severe, widespread, or dangerous to humans, and every pet should receive them. Optional, or non-core, vaccines protect against diseases whose risk depends on your pet’s lifestyle, location, and contact with other animals. The right plan is core vaccines for all, plus selected optional vaccines matched to your individual pet.

Core vaccines for dogs

These typically protect against distemper, parvovirus, canine adenovirus (hepatitis), and, where required by law or risk, rabies. Parvovirus alone kills many unvaccinated puppies each year, and it is preventable.

Core vaccines for cats

These usually cover feline panleukopenia, feline herpesvirus, and calicivirus, plus rabies where relevant. Panleukopenia is often fatal in kittens, which is why core status is not optional in practice.

Common optional vaccines

Examples include leptospirosis and kennel cough for dogs, and feline leukemia virus for cats. Whether your pet needs these depends on whether they board, socialize widely, roam outdoors, or live in a high-risk area.

How boosters actually work

The puppy and kitten series matters because maternal antibodies can block early vaccines, so a course of doses is given to ensure protection takes hold. After the first-year booster, guidance has shifted. Modern recommendations from major veterinary bodies support giving several core vaccines every three years rather than annually, based on evidence that immunity lasts longer than once assumed. Some optional vaccines, however, provide shorter protection and do need yearly boosting.

A real scenario

A dog owner asked why her vet recommended annual kennel cough vaccine but only gave distemper and parvo every three years. The reason is straightforward. Distemper and parvo immunity is long-lasting, so annual dosing adds little. Kennel cough protection fades faster, and her dog boarded twice a year, so a yearly booster before boarding made sense. This is the whole principle in one example: frequency should follow the disease and the lifestyle, not a fixed calendar for everything.

Weighing benefits and downsides

Vaccines carry real benefits and small risks, and honesty about both builds trust. Serious reactions are uncommon; mild ones like a day of tiredness or a small lump at the injection site are more typical. The far larger risk for most pets is the disease itself. At the same time, giving optional vaccines a pet does not need adds cost and unnecessary injections. The balanced approach is neither refusing vaccines nor accepting every one on the list, but choosing based on risk.

Common mistakes and how to fix them

Mistake: skipping the puppy or kitten series. One dose is not enough for lasting protection. Fix: complete the full course on schedule.

Mistake: taking a puppy out too early. Full protection takes time after the final dose. Fix: ask your vet when it is safe to socialize in public spaces.

Mistake: assuming every vaccine is annual. Fix: ask which of your pet’s vaccines are three-yearly and which truly need yearly boosting.

Mistake: accepting or refusing the whole list. Fix: review each optional vaccine against your pet’s actual lifestyle.

Action steps for a smart plan

  • Ask your vet to separate your pet’s vaccines into core and optional
  • Confirm which vaccines are due every three years versus every year
  • Describe your pet’s real lifestyle: boarding, dog parks, outdoor access, travel
  • Complete the full puppy or kitten series before relaxing outings
  • Keep a vaccination record and note the next due dates
  • Discuss antibody titre testing if you want to check immunity before re-vaccinating certain diseases

Conclusion and next step

A good vaccination plan is precise, not maximal: core vaccines for every pet, optional ones chosen by risk, and boosters timed to how long protection lasts. Your next step: pull out your pet’s records and ask your vet at the next visit which vaccines are core, which are optional, and when each is genuinely due.

Frequently asked questions

Are annual vaccines always necessary?

Not for every disease. Several core vaccines are now recommended every three years, while some optional ones still need yearly boosters. Your vet can tell you which is which for your pet.

What is a titre test?

It is a blood test that measures existing antibody levels for certain diseases. It can help decide whether a booster is needed, though it is not available or meaningful for every vaccine.

Is it safe to vaccinate an older pet?

Generally yes. Age alone is not a reason to stop core protection, though your vet will weigh any health conditions and may adjust the plan.

My pet never leaves the house. Do they still need vaccines?

Core vaccines are still advised, because diseases like parvovirus survive in the environment and can be carried indoors. Optional vaccines may be reduced, based on the low contact risk.

Can vaccines make my pet sick?

Mild, short-lived effects like tiredness are the most common. Serious reactions are rare, and for most pets the protection far outweighs the small risk.

References

World Small Animal Veterinary Association (WSAVA) Vaccination Guidelines; American Animal Hospital Association (AAHA); American Association of Feline Practitioners (AAFP).

Pet Emergency First Aid: The First 10 Minutes

In a pet emergency, what you do in the first ten minutes can change the outcome. The goal is not to treat everything yourself, but to stabilize your pet, avoid making things worse, and get to a vet fast. This article gives you clear, calm steps for the most common emergencies, and just as importantly, tells you what not to do.

Before anything else

Do two things immediately in any emergency. First, keep yourself safe: even a gentle pet may bite or scratch when in pain or panic, so approach slowly and consider a makeshift muzzle for dogs if they are not vomiting or struggling to breathe. Second, call your vet or the nearest emergency clinic on the way, not after. Program those numbers into your phone now, before you ever need them.

Honesty matters here: home first aid buys time. It is not a substitute for professional care. Almost every scenario below ends with “get to a vet.”

Serious bleeding

Apply firm, direct pressure with a clean cloth or gauze over the wound. Hold it steady for several minutes rather than lifting to peek, which restarts the bleeding. If blood soaks through, add more cloth on top instead of removing the first layer. For a bleeding limb, keeping it still and slightly elevated can help. Avoid tourniquets unless you have training, because a poorly applied one can cause serious damage.

Choking

Signs include pawing at the mouth, retching, blue gums, and distress. Open the mouth and look; if you can clearly see an object, try to sweep it out with a finger, but never blindly reach down the throat, as you may push it deeper or get bitten. For a small dog or cat, hold them with the head down and give firm taps between the shoulder blades. For a larger dog, a modified abdominal thrust (hands just behind the ribcage, quick inward and upward pushes) can help. Head to the vet even if the object comes out, because the throat may be injured.

Heatstroke

This is a true emergency, common in warm cars and after exercise in heat. Signs include heavy panting, drooling, weakness, vomiting, and collapse. Move your pet to shade or air conditioning right away. Cool with room-temperature or cool water over the body, especially the belly and paws, and use a fan.

The cooling mistake to avoid

Do not use ice-cold water or ice baths. Cooling too fast causes surface blood vessels to constrict and can trap heat inside, and it may drop the temperature dangerously low. Aim for steady cooling, and stop actively cooling once your pet seems more comfortable, then get to the vet, because heatstroke damages internal organs in ways you cannot see.

Suspected poisoning

Note what was eaten, how much, and when, and bring the packaging. Do not induce vomiting unless a veterinarian or poison control tells you to; with some substances, such as certain caustics or petroleum products, vomiting causes more harm on the way back up. In the United States, the ASPCA Animal Poison Control Center and the Pet Poison Helpline are real, staffed services (a consultation fee may apply) that can guide you while you head to the clinic.

You can also explore this resource.

A real scenario

A family’s Labrador collapsed after playing fetch on a hot afternoon, panting hard and unsteady. They resisted the urge to dunk him in an ice bath. Instead they moved him into the shade, poured cool tap water over his body, aimed a fan at him, and drove to the clinic while calling ahead. Because they cooled him gradually and did not delay, the dog recovered. Fast, correct action, not perfect equipment, made the difference.

Common mistakes and how to fix them

  • Inducing vomiting on your own. Fix: call a vet or poison control first; it is dangerous with some toxins.
  • Using ice water for heatstroke. Fix: use cool, not freezing, water and cool gradually.
  • Giving human medicines. Fix: never give ibuprofen, acetaminophen, or aspirin without vet direction; several are toxic to pets.
  • Blindly reaching into a choking pet’s throat. Fix: only remove objects you can clearly see.
  • Driving without calling ahead. Fix: phone the clinic so the team is ready when you arrive.
  • Waiting to see if it gets better. Fix: with breathing trouble, collapse, or suspected poisoning, minutes count.

Your action checklist

  • Save your vet and nearest emergency clinic numbers in your phone today.
  • Keep a basic kit: gauze, clean cloth, tweezers, a muzzle, and a blanket.
  • Keep yourself safe before handling an injured pet.
  • Call for guidance while you travel, not after.
  • Apply direct pressure for bleeding; do not remove soaked cloths.
  • Cool heatstroke gradually with cool, not icy, water.
  • Never induce vomiting or give human drugs without professional direction.

Conclusion and next step

Staying calm, avoiding the common mistakes, and getting professional help fast is what protects your pet in an emergency. Your next step: right now, add your regular vet and the closest 24-hour emergency clinic to your phone contacts, and note a pet poison helpline number. That two-minute task is the best first aid you can do before anything happens.

FAQ

Should I ever try CPR on my pet?

Only if your pet is unresponsive and not breathing, and ideally only if you have learned the technique. Chest compressions on a healthy or breathing animal can cause harm, so getting to a vet remains the priority.

What should be in a basic pet first-aid kit?

Gauze and clean cloths, self-adhesive bandage, tweezers, blunt scissors, a digital thermometer, a muzzle, a spare leash, a blanket, and your vet and poison control numbers.

When is something a true emergency versus something that can wait?

Trouble breathing, collapse, uncontrolled bleeding, suspected poisoning, seizures, bloated abdomen, or inability to urinate are emergencies. When unsure, call your vet and describe the signs; they can triage quickly.

Can I give my dog aspirin for pain until I reach the vet?

No, not without veterinary direction. Human pain relievers can be toxic to dogs and cats, and they can complicate the treatment the vet needs to give.

References

  • ASPCA Animal Poison Control Center
  • Pet Poison Helpline
  • American Veterinary Medical Association (AVMA) pet first aid resources
  • American Red Cross pet first aid guidance

Pet Emergency Signs: What Can’t Wait for the Vet

Not every worrying symptom is a true emergency, but a few are, and knowing the difference can save your pet’s life and your money. This guide gives you a clear way to decide when to rush to the clinic, when to call first, and when it is safe to watch and wait until morning.

Why the difference matters

Two mistakes are common. The first is waiting too long with a genuine emergency, like a bloated abdomen or trouble breathing, where minutes count. The second is rushing to an after-hours clinic for something minor and paying a large bill for a problem that would have settled on its own. Both come from not knowing which signs signal real danger. The goal is calm, correct decisions.

Signs that mean go now

Some situations need immediate veterinary care, day or night. Do not wait to see if they improve.

  • Difficulty breathing, blue or grey gums, or open-mouth breathing in a cat
  • A swollen, hard, or distended belly, especially with unproductive retching in a large-breed dog (a possible sign of bloat, which is rapidly fatal)
  • Repeated vomiting or collapse in a male cat that cannot urinate (a blocked bladder is a true emergency)
  • Seizures lasting more than a few minutes or repeating without recovery
  • Heavy bleeding that does not slow with pressure, or a suspected broken bone
  • Known poisoning: chocolate, grapes, xylitol, antifreeze, rodenticide, or human medication
  • Signs of severe pain, sudden weakness, or inability to stand
  • Straining to give birth for over an hour with no puppy or kitten

Signs that usually mean call first, then decide

These are worth a phone call to your vet or an emergency line. Many can wait a few hours, but the advice depends on your pet’s age and history.

  • One episode of vomiting or diarrhea in an otherwise bright, active pet
  • Limping but still bearing some weight
  • A small cut, torn nail, or minor eye irritation
  • Reduced appetite for less than a day with normal energy
  • Mild itching or a single lump you have not noticed growing

How to check gum color and hydration

Two quick checks help you describe the situation on the phone. Lift the lip and press the gum: it should blanch white then return to pink within about two seconds. Pale, white, or blue gums are a red flag. For hydration, gently lift the skin between the shoulder blades; it should snap back quickly. Slow return suggests dehydration.

A real scenario

A client called about her Labrador pacing, drooling, and trying to vomit without bringing anything up. His belly looked tight. She almost decided to wait until morning. On the phone we recognized possible gastric dilatation-volvulus, a twisted stomach. She came in immediately, and surgery saved him. Had she waited even a couple of hours, the outcome would likely have been fatal. The lesson: unproductive retching plus a swelling belly in a big dog is never a wait-and-see problem.

Common mistakes and how to fix them

Mistake: giving human painkillers. Ibuprofen and paracetamol can be toxic, and paracetamol is often deadly to cats. Fix: never medicate without veterinary direction.

Mistake: inducing vomiting for every poison. Some substances, like caustics or petroleum products, cause more damage coming back up. Fix: call before making your pet vomit.

Mistake: assuming a cat is just quiet. Cats hide illness well. A cat hiding, not eating, and breathing fast is often seriously unwell. Fix: treat sudden withdrawal as a warning sign.

Action steps to prepare now

  • Save your regular vet and nearest 24-hour clinic numbers in your phone today
  • Know your route to the emergency clinic before you need it
  • Keep a pet first-aid basics list and a carrier that is easy to grab
  • Note your pet’s normal gum color, breathing rate at rest, and weight
  • Keep the animal poison guidance number for your country handy

Conclusion and next step

You do not need to memorize every disease. You need to recognize the handful of signs that mean act now, and to have a phone number ready for everything else. Your next step: program both vet numbers into your phone before you close this page.

Frequently asked questions

My dog ate chocolate but seems fine. Do I still call?

Yes. Symptoms can be delayed. Toxicity depends on the type and amount of chocolate and your dog’s weight, so call with those details so the risk can be assessed properly.

How do I know if my cat cannot urinate?

Watch for frequent trips to the litter box with little or no output, crying, licking the genitals, and restlessness. A blocked male cat is a life-threatening emergency, so seek care the same day.

Is one episode of vomiting an emergency?

Usually not, if your pet is otherwise bright and drinking. It becomes urgent with repeated vomiting, blood, a painful belly, lethargy, or a known toxin.

What is a normal resting breathing rate?

For most dogs and cats at rest, a rate under about thirty breaths per minute is typical. Counting your pet’s normal rate when healthy gives you a personal baseline to compare against.

References

American Veterinary Medical Association (AVMA); RSPCA; ASPCA Animal Poison Control Center.

Flea, Tick & Worm Control: A Year-Round Pet Plan

Parasite prevention feels confusing because there are dozens of products and conflicting advice. This article gives you a clear framework to protect your pet from fleas, ticks, and worms year-round, choose the right product type, and avoid the errors that let infestations return.

Why parasites are a year-round issue

Many owners stop treatment in winter, but heated homes let fleas survive and breed indoors all year. Ticks are active whenever temperatures rise above freezing, which in many regions is most months. Intestinal worms spread through eggs in soil, feces, and prey, none of which respect seasons. Gaps in coverage are exactly when parasites re-establish, so consistency matters more than any single product.

Know what you are fighting

Fleas

Fleas cause itching, allergic skin disease, and in young or small pets, anemia from blood loss. The adults you see are a fraction of the population; most of it is eggs and larvae in your carpet and bedding. That is why treating only the pet, and only once, usually fails.

Ticks

Ticks transmit serious diseases such as Lyme disease and, in some regions, life-threatening conditions like babesiosis. Speed of protection matters because disease risk rises the longer a tick stays attached.

Worms

Roundworms, hookworms, tapeworms, and, in many areas, heartworm affect pets differently. Some intestinal worms also infect humans, especially children, which makes routine deworming a public health measure, not just a pet one.

Choosing a product type

The best product depends on your pet, your region, and your household. Use this comparison as a starting point for a conversation with your vet.

Type Covers Best for Watch out for
Spot-on (topical) Fleas, often ticks, some worms Pets that resist tablets Bathing or swimming can reduce effect; keep pets apart while wet
Oral tablet or chew Fleas, ticks, some worms Fast, bath-proof control Must be eaten fully; needs a separate wormer if not included
Collar Fleas and ticks, longer term Steady long-duration cover Fit and removal safety; less useful for worms
Dedicated wormer Intestinal worms, heartworm by prescription Targeted worm control Does not treat fleas or ticks

No single product does everything everywhere. Many pets need a combination, and heartworm prevention in particular is prescription-only and region-specific.

A real scenario

A family treated their cat for fleas but the itching kept coming back every few weeks. The cat was protected; the home was not. The carpet and the cat’s favorite chair held thousands of eggs and larvae. Once they treated all pets in the household on the same day, washed bedding hot, and vacuumed daily for two weeks, the cycle finally broke. The product was never the problem. The environment and the untreated second pet were.

Common mistakes and how to fix them

Mistake: treating one pet, not all. Untreated animals reseed the home. Fix: treat every furry pet in the house together.

Mistake: using dog products on cats. Some canine flea products contain permethrin, which can kill cats. Fix: only use species-specific products and read the label.

Mistake: dosing by guesswork. Under-dosing fails and over-dosing risks harm. Fix: weigh your pet and match the product to that weight.

Mistake: ignoring the environment. Fix: wash bedding, vacuum thoroughly, and repeat, because most of a flea population lives off the pet.

Your year-round action plan

  • Weigh your pet and confirm the correct product and dose with your vet
  • Treat every pet in the household on the same schedule, all year
  • Set a phone reminder so you never miss a dose
  • Deworm on a schedule suited to your pet’s lifestyle; hunters and puppies need more frequent treatment
  • Check pets for ticks after walks and remove any promptly with a proper tick tool
  • Wash bedding hot and vacuum regularly during any flea outbreak
  • Ask your vet about heartworm risk in your area before travel

Conclusion and next step

Effective control is less about finding a magic product and more about consistency and covering the whole household and environment. Your next step: check the label on your current product, confirm it matches your pet’s weight and species, and set a recurring reminder for the next dose.

Frequently asked questions

Do indoor cats really need parasite prevention?

Often yes. Fleas arrive on shoes, other pets, and visitors, and mosquitoes carrying heartworm can enter homes. Discuss your cat’s specific risk with your vet.

How often should I deworm my pet?

It depends on lifestyle. Pets that hunt, scavenge, or live with young children generally need more frequent worming, while low-risk adults need less. Your vet can set an interval that fits.

Can I use a cheaper supermarket product?

Some work well and some are outdated or weak. The issue is matching the active ingredient to the parasites in your area, so ask your vet which products are still reliable locally.

My pet still has fleas after treatment. Why?

Usually the home environment or an untreated housemate, not product failure. Treat all pets, clean the environment thoroughly, and give it a few weeks for the life cycle to break.

References

European Scientific Counsel Companion Animal Parasites (ESCCAP); American Heartworm Society; Companion Animal Parasite Council (CAPC).

How to Switch Your Pet’s Food Without Stomach Upset

Changing your pet’s food too fast is one of the most common causes of sudden diarrhea and vomiting. The fix is simple: transition gradually over about a week so your dog or cat’s gut has time to adjust. This article gives you a clear day-by-day plan, explains why the gut reacts the way it does, and shows you how to handle a pet that refuses the new food.

Why a slow switch matters

Your pet’s digestive system relies on a stable population of gut bacteria and a fixed set of enzymes matched to the current diet. When you swap foods overnight, that microbial community cannot adapt in time. The result is fermentation of undigested food, loose stool, gas, and sometimes vomiting. A gradual transition lets the microbiome shift in step with the new ingredients.

This is true even when the new food is higher quality. “Better” food still counts as a change to the gut. Protein source, fat level, and fiber content all influence how smoothly the switch goes.

The standard 7-day transition

Mix the old and new food together, shifting the ratio a little each day. A common, well-tolerated schedule:

Days Old food New food
Day 1-2 75% 25%
Day 3-4 50% 50%
Day 5-6 25% 75%
Day 7 0% 100%

When to go slower

Some pets need 10 to 14 days rather than 7. Slow down if your pet has a history of a sensitive stomach, inflammatory bowel disease, food allergies, or if you are switching between very different diets, such as kibble to raw or chicken-based to novel protein. Puppies, kittens, and seniors also tend to do better with a longer runway.

How to read the stool

Watch the stool at each stage. If it stays firm, move to the next ratio on schedule. If it turns soft, hold at the current ratio for an extra day or two before increasing the new food. Firm stool is your green light; soft stool is your signal to pause, not to abandon the switch.

A real scenario

A client moved her Beagle straight onto a new salmon formula because the old bag ran out. Within a day the dog had watery stool three times overnight. This was not an allergy; it was speed. We restarted with 80% of the familiar food and reintroduced the salmon formula over 12 days. By the end the dog was eating 100% new food with normal stool. The food was never the problem. The pace was.

Common mistakes and how to fix them

  • Switching cold turkey when the old bag runs out. Fix: keep a small reserve of the current food, or buy the new food before the old one is finished.
  • Changing two things at once. Adding a new treat, supplement, or dental chew during a food switch makes it impossible to know what caused an upset. Fix: change one variable at a time.
  • Giving up at the first soft stool. A brief loosening is normal. Fix: hold the ratio steady rather than jumping back to square one.
  • Free-feeding during the transition. Fix: use measured meals so you can track exactly how much new food your pet is actually eating.
  • Ignoring red flags. Repeated vomiting, blood in stool, lethargy, or refusal to eat for more than a day are not part of a normal transition and warrant a call to your vet.

Your action checklist

  • Buy the new food before the old food runs out.
  • Follow the 7-day ratio table, extending to 10-14 days for sensitive pets.
  • Feed measured meals, not a full bowl left out.
  • Check stool at each stage; hold the ratio if it softens.
  • Change only one thing at a time.
  • Keep fresh water available at all times.
  • Call your vet if vomiting, bloody stool, or appetite loss appears.

Conclusion and next step

A calm, gradual switch prevents almost all diet-related stomach upset. Your next step: check how much food is left in the current bag today, and if it is running low, order the new food now so you never have to switch overnight. Then start on the transition schedule with the first measured meal.

FAQ

How long should switching pet food take?

About 7 days for most healthy adults, and 10 to 14 days for pets with sensitive stomachs, chronic GI issues, or when moving between very different diets.

My pet has diarrhea after switching. What now?

Go back to a higher percentage of the old food, then increase the new food more slowly. If diarrhea persists beyond a couple of days, contains blood, or comes with lethargy or vomiting, contact your vet.

Can I switch faster if the new food is the same brand?

Sometimes, but not always. Different formulas within one brand can vary in protein and fiber, so a gradual switch is still the safer default.

My cat refuses the new food. Any tips?

Cats are neophobic and may reject sudden change. Start with just 10% new food, warm wet food slightly to boost aroma, and never let a cat go more than about a day without eating, as prolonged fasting is dangerous for cats.

Do I need to switch food at all if my pet is doing well?

Not usually. If your pet is healthy and thriving, there is rarely a reason to change. Switch when your vet recommends it for a health reason, or when a formula is discontinued.

References

  • American Veterinary Medical Association (AVMA)
  • American Animal Hospital Association (AAHA)
  • WSAVA Global Nutrition Committee

Recognizing When a Dog or Cat Is Quietly in Pain

One of the hardest parts of caring for a pet is that they cannot tell us when something hurts. Unlike a person who can point to a sore knee or describe a dull ache, dogs and cats rely on us to notice the small signals they give off. Many animals are remarkably good at hiding discomfort, and by the time an owner realizes something is wrong, a condition may have been developing for weeks or even months. Learning to read the quiet language of pain is one of the most valuable skills a pet owner can build.

Why Animals Hide Their Discomfort

The instinct to mask pain is deeply rooted in survival. In the wild, an animal that shows weakness becomes an easy target for predators or a lower-ranking member of the group. Domestic dogs and cats still carry this instinct, even in the comfort of a family home. A cat with a painful bladder or a dog with aching joints will often carry on eating, greeting the family, and going about the day, doing its best to appear normal. This means the absence of obvious distress does not guarantee the absence of pain. Owners who wait for a clear signal, such as crying out or limping badly, may miss the earlier and more subtle stage when treatment is easier and more effective.

Subtle Changes in Behavior

Behavioral shifts are frequently the first clue that something is wrong. These changes can be easy to dismiss as moodiness, aging, or a passing phase, but they deserve attention. Watch for patterns rather than one-off events.

  • A normally social pet that begins hiding, retreating to quiet corners, or avoiding contact.
  • Increased irritability, such as growling, hissing, or snapping when touched in a particular area.
  • Reluctance to jump onto the sofa, climb stairs, or get into the car, when these things were once easy.
  • Restlessness at night, pacing, or difficulty settling into a comfortable position.
  • Loss of interest in play, walks, or favorite activities.

A concrete example helps illustrate the point. A middle-aged cat that suddenly stops jumping onto a windowsill it has used for years may not be lazy or bored. It may be experiencing early arthritis, and the effort of the jump has quietly become painful. Similarly, a dog that begins snapping when its hindquarters are brushed may be reacting to hip or spinal discomfort rather than developing a bad temperament.

Physical Signs Worth Watching

Alongside behavior, the body offers its own set of clues. Some are visible in how a pet moves, while others show up in grooming habits or posture. A dog in pain may hold its head lower than usual, arch its back, or shift its weight off a sore leg. Cats often adopt a hunched, tucked position with the paws drawn in when their abdomen hurts. Changes in grooming can be telling as well. A cat that stops grooming may feel too sore to twist and reach, while excessive licking or chewing at one spot can point to pain or irritation in that exact area.

Appetite and toilet habits also matter. Reluctance to eat hard food can indicate mouth or tooth pain, while straining or vocalizing in the litter box may signal a urinary problem that is genuinely painful and, in male cats, potentially an emergency. Rapid, shallow breathing while resting, a tense facial expression with the eyes partly closed, or trembling can all accompany discomfort.

How Pain Looks Different in Cats and Dogs

It helps to remember that cats and dogs express pain differently. Dogs are often more outwardly expressive. They may whimper, lick a sore joint, or seek extra reassurance from their owners. Cats tend to withdraw and go silent, which is why feline pain is so easy to overlook. A cat that spends more time under the bed, skips its usual spot on the couch, or seems to have simply become less involved in family life may be sending a message that is easy to miss. Because cats are such experts at concealment, any noticeable change in a cat’s routine deserves to be taken seriously.

What You Can Do at Home

The most useful thing an owner can do is pay attention and keep a record. When you notice a change, make a note of what you saw and when. Photos and short videos are especially valuable, because a limp or an unusual posture may not appear during the short window of a clinic visit. Showing your veterinarian a clip of your dog rising stiffly in the morning can be far more informative than trying to describe it.

  • Track appetite, energy, sleep, and toilet habits so you can spot trends.
  • Gently observe how your pet moves, but avoid pressing or manipulating a suspected sore area, which could cause more pain or a defensive bite.
  • Never give human pain medication. Common products such as ibuprofen and paracetamol are toxic to pets and can be fatal, particularly to cats.
  • Keep resting areas warm, soft, and easy to reach, and consider ramps or lower-sided litter boxes for pets that struggle to climb or step.

When to Contact the Clinic

Some situations call for prompt professional attention rather than watchful waiting. Sudden, severe pain, an inability to stand or walk, repeated attempts to urinate without success, a swollen or tense abdomen, or crying out when touched all warrant a call to the veterinary team without delay. For slower changes, such as gradually reduced activity or stiffness, it is still worth booking an examination. Pain is not simply a matter of comfort; it is often the outward sign of an underlying condition that benefits from being found early.

Recognizing quiet pain is ultimately about knowing your individual pet. You are the person who sees them every day and knows what normal looks like for them. Trusting that instinct, and acting on it when something feels off, gives your veterinarian the information they need to help. The animals in our care depend on us to notice what they cannot say, and a watchful, attentive owner is often the difference between suffering that goes unaddressed and a problem caught in time.

Keeping Fleas, Ticks, and Worms Away Throughout the Year

Parasites are among the most common health concerns a veterinarian sees, and also among the most preventable. Fleas, ticks, and worms are not just an unpleasant nuisance; they can carry disease, cause serious illness, and in some cases spread from pets to the people who live with them. The good news is that with a steady, consistent routine, most of these problems can be kept firmly at bay. The key word is consistent, because parasite control works best when it is treated as an ongoing habit rather than a reaction to a problem that has already taken hold.

Why Prevention Is a Year-Round Job

Many owners assume parasites are only a warm-weather concern and stop protecting their pets once the temperature drops. In reality, modern homes stay warm through the colder months, and fleas in particular thrive happily indoors all year. Carpets, bedding, and heated rooms provide a comfortable environment for flea eggs and larvae regardless of the season outside. Ticks, too, remain active in mild spells during autumn and winter in many regions. Stopping prevention for part of the year leaves a gap that parasites are quick to exploit, and an established infestation is far harder to clear than one that never gets started. Thinking of prevention as a continuous routine, rather than a seasonal task, is the single most effective mindset an owner can adopt.

Fleas Are More Than Just an Itch

Fleas are often dismissed as a minor irritation, but their impact can be significant. A single flea can bite many times a day, and for pets with flea allergy dermatitis, even one or two bites can trigger intense itching, hair loss, and raw, infected skin. Heavy infestations in small or young animals can cause anemia through blood loss. Fleas can also transmit tapeworm when a pet swallows an infected flea during grooming.

Part of what makes fleas so persistent is their life cycle. The adult fleas you see on your pet represent only a small fraction of the total population. The majority exists as eggs, larvae, and pupae hidden in the environment, in carpets, sofa cushions, and floor cracks. This is why treating the pet alone is often not enough. When an infestation takes hold, the home usually needs attention too, including thorough vacuuming, washing of bedding on a hot cycle, and sometimes an environmental treatment recommended by your veterinarian.

Ticks and the Diseases They Carry

Ticks are a growing concern in many areas, and they deserve respect because of the diseases they can transmit. When a tick attaches and feeds, it can pass on serious illnesses such as Lyme disease and other tick-borne infections that affect both animals and people. The risk rises the longer a tick stays attached, which is why prompt removal matters.

Pets that walk in long grass, woodland, or areas where deer and wildlife roam are at higher risk. After walks in these environments, run your hands slowly over your pet’s body, checking especially around the ears, neck, armpits, and between the toes, where ticks like to hide. If you find one, it should be removed carefully with a proper tick-removal tool that lifts the whole tick out without squeezing its body or leaving the mouthparts behind. Twisting gently with the correct tool is far safer than pulling with fingers or trying folk remedies, which can cause the tick to release more saliva and increase infection risk.

Intestinal Worms and Heartworm

Worms are less visible than fleas and ticks, which makes them easy to forget, but they can cause real harm. Roundworms and tapeworms live in the digestive tract and can lead to weight loss, a dull coat, vomiting, or a pot-bellied appearance, particularly in puppies and kittens. Some intestinal worms can also infect humans, making regular deworming an important part of protecting the whole household, especially where young children are present.

In regions where it occurs, heartworm is a far more dangerous parasite. Spread by mosquito bites, heartworm larvae mature into worms that live in the heart and lungs, causing damage that can be fatal and is difficult to treat once established. Prevention is straightforward and vastly preferable to treatment, which is one reason veterinarians place such emphasis on year-round heartworm protection in at-risk areas.

Building a Prevention Routine

A reliable routine is the backbone of parasite control. Products vary in what they cover and how often they need to be given, so the right plan depends on your pet, your location, and your lifestyle. Your veterinarian can match a program to your specific circumstances rather than leaving you to guess.

  • Use veterinary-recommended flea and tick products at the correct interval, and mark the next dose on a calendar so it is not forgotten.
  • Follow a deworming schedule appropriate to your pet’s age and risk, which is more frequent for puppies and kittens than for adults.
  • Choose products suited to the species. Some dog flea treatments are highly toxic to cats, so never share products between animals.
  • Weigh your pet before choosing a dose, since many treatments are weight-based and an incorrect dose may be ineffective or unsafe.
  • Keep a written or app-based record so the whole household knows what has been given and when.

Checking Your Pet at Home

Regular hands-on checks complement any prevention product. Comb through your pet’s coat with a fine-toothed flea comb, paying attention to the base of the tail and the belly. Small dark specks that turn reddish-brown on a damp tissue are flea dirt, a telltale sign of fleas even when you cannot spot the insects themselves. Look for scratching, biting, or areas of thinning fur, and check the skin for redness or scabs.

If you find evidence of parasites despite a prevention routine, resist the urge to simply buy a stronger product off the shelf. Contact your clinic instead. An infestation that breaks through prevention may point to a missed dose, an environmental reservoir in the home, or a product that is not the right fit. A short conversation with your veterinary team can save weeks of frustration. Steady prevention, regular checks, and prompt advice when something seems wrong together form a simple but powerful defense that keeps parasites from ever gaining a foothold.